DIY Mini Laser Engraver Cheap: A Comprehensive Guide
Are you looking for a cost-effective way to create custom designs, etchings, or carvings? If so, you might be interested in the diy mini laser engraver cheap. This compact tool is designed for hobbyists, crafters, and small businesses who want to explore the world of laser engraving without breaking the bank. In this article, we’ll dive into everything you need to know about this affordable laser engraver, including its features, benefits, and how it can transform your creative projects.
Why Get a DIY Mini Laser Engraver Cheap?
Laser engraving has become increasingly popular in recent years due to its precision and versatility. However, many high-end models are expensive and may not be practical for casual users or small-scale projects. That’s where the diy mini laser engraver cheap comes in. This device offers a budget-friendly alternative without compromising on quality. Whether you’re creating personalized gifts, custom signage, or artistic designs, this engraver is an excellent choice.
One of the most appealing aspects of this tool is its small size and portability. Unlike bulky industrial-grade laser engravers, the diy mini version can fit easily on your desk or workbench. This makes it ideal for home use or small workshops. Additionally, its affordability means you don’t have to invest a lot of money upfront to start experimenting with laser engraving.
How Does a DIY Mini Laser Engraver Work?
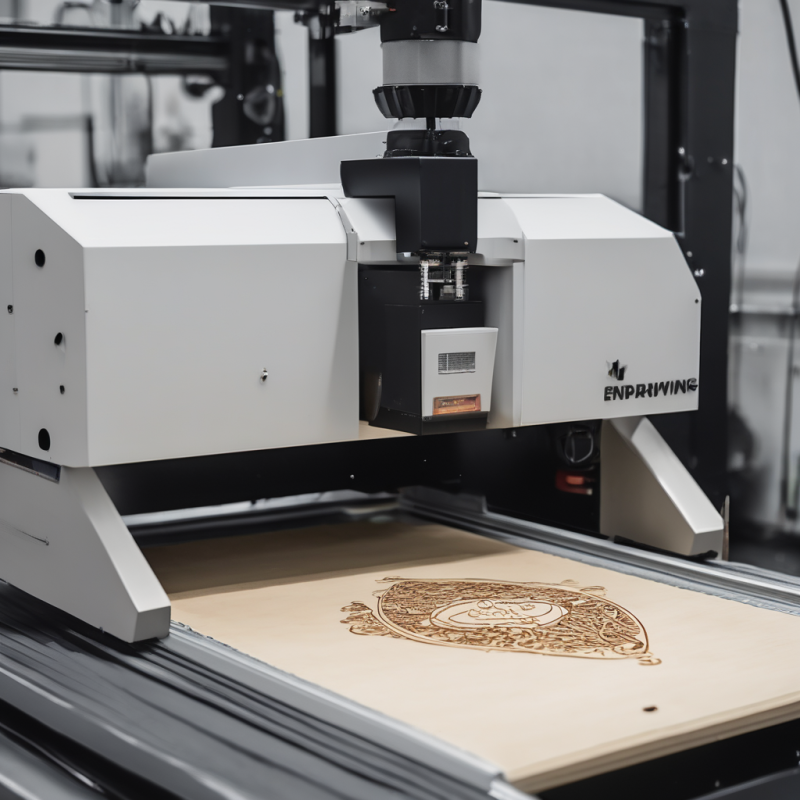
Laser engraving works by using a focused beam of light to etch or cut materials. The diy mini laser engraver cheap uses a low-power laser, which is safe for most home and hobbyist applications. The process involves loading your design into the engraver’s software, positioning the material, and letting the machine do the work. The laser heats the surface of the material, removing or discoloring it to create your desired pattern.
While this tool is designed for beginners, it still offers enough flexibility for experienced users to experiment with different techniques. For example, you can adjust the laser’s power and speed settings to achieve varying depths of engraving. This makes it possible to create everything from subtle textures to deep carvings, depending on your project.
Key Features of the DIY Mini Laser Engraver
Here are some of the standout features that make this laser engraver a great choice:
- Small and compact design: Perfect for limited workspace.
- Affordable pricing: Ideal for hobbyists who want to try laser engraving without a large investment.
- Easy setup and operation: User-friendly interface makes it simple to get started.
- Versatile material compatibility: Works with wood, plastic, leather, and other materials.
- High precision: Capable of intricate designs and detailed engravings.
Benefits of Using a DIY Mini Laser Engraver
There are several reasons why the diy mini laser engraver cheap is worth considering:
- Cost-effective: Saves money compared to larger, more expensive models.
- Time-saving: Automates the engraving process, reducing manual labor.
- Versatile applications: Suitable for a wide range of projects, from jewelry making to signage creation.
- Educational value: Great for teaching basic principles of laser engraving and design software.
If you’re wondering how to get started with this tool, don’t worry! Most models come with detailed instructions and may even include tutorials or sample projects to help you learn the basics.
Frequently Asked Questions About the DIY Mini Laser Engraver
Before purchasing a diy mini laser engraver cheap, you might have some questions. Here are answers to some of the most common ones:
What materials can I use with this engraver?
The engraver works best with non-metallic materials like wood, plastic, leather, and acrylic. It’s not recommended for metal or glass due to the laser’s lower power output.
Is it safe to use at home?
Yes, as long as you follow safety guidelines. Always wear protective eyewear and ensure proper ventilation when engraving materials that produce fumes.
How easy is it to set up?
Most models are designed for quick setup. You’ll need to install the software, calibrate the machine, and load your first project—all of which can be done in under an hour.
Getting Started with Your DIY Mini Laser Engraver
If you’re ready to take the plunge and purchase a diy mini laser engraver cheap, here’s how to get started:
- Purchase your engraver: Choose from reputable sellers to ensure quality. You can find it on platforms like Amazon or specialized hobby stores.
- Set up the machine: Follow the instructions to assemble and calibrate your engraver.
- Learn the software: Most engravers come with design software that’s user-friendly for beginners. Take some time to explore its features.
- Practice on scrap material: Start with simple designs and inexpensive materials to get a feel for how the machine works.
- Create your first project: Once you’re comfortable, move on to more complex designs or larger-scale projects.
Maintenance Tips for Your DIY Mini Laser Engraver
To keep your engraver in top condition, follow these maintenance tips:
- Clean the laser head regularly to prevent dust buildup.
- Check and replace consumables like belts or mirrors as needed.
- Store the machine in a dry, dust-free environment when not in use.
- Use genuine replacement parts to ensure optimal performance.
Conclusion
The diy mini laser engraver cheap is an excellent tool for anyone looking to explore the world of laser engraving without a significant financial investment. Its compact size, versatility, and ease of use make it ideal for hobbyists, crafters, and small businesses alike. Whether you’re creating personalized gifts, custom signage, or artistic designs, this machine has the potential to transform your creative projects. If you’re ready to take your crafting skills to the next level, why not give this affordable laser engraver a try? You can purchase it from trusted sellers like or specialized hobby stores.