


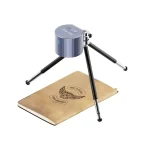

LaserHawk LH1 Pro: A Comprehensive Tutorial for Mastering Laser Engraving
Laser engraving has become an essential tool for hobbyists, artists, and professionals alike, offering precision and creativity in a wide range of applications. If you’re looking to dive into the world of laser engraving, the LaserHawk LH1 Pro is a top-of-the-line device that combines power, accuracy, and ease of use. This tutorial will guide you through everything you need to know about using the LaserHawk LH1 Pro, from setup to advanced techniques.
Understanding the LaserHawk LH1 Pro
Before diving into laser engraving, it’s important to understand the technical specifications and capabilities of your machine. The LaserHawk LH1 Pro is designed for versatility, making it suitable for a wide range of materials including wood, metal, plastic, and more.
Technical Specifications
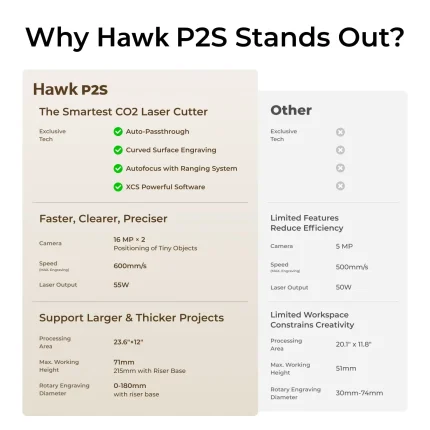
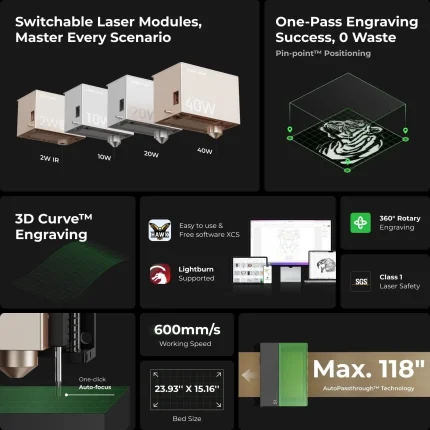
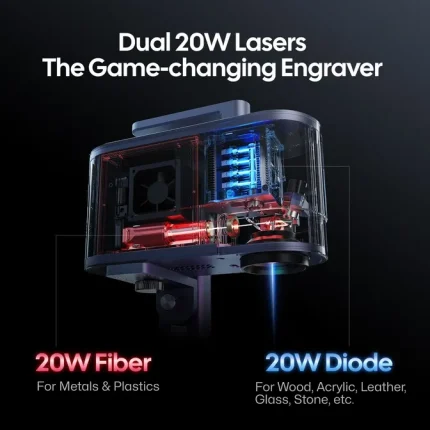
- Power Output: Up to 40W CO2 laser
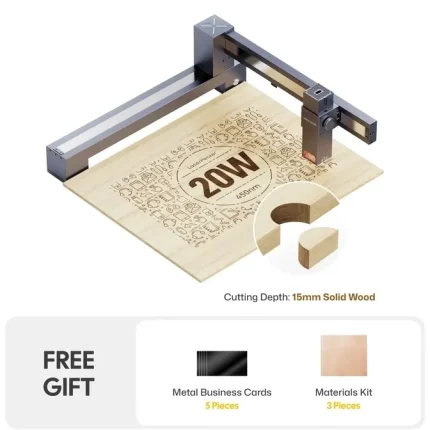
- Engraving Area: 30cm x 30cm (11.8″ x 11.8″)
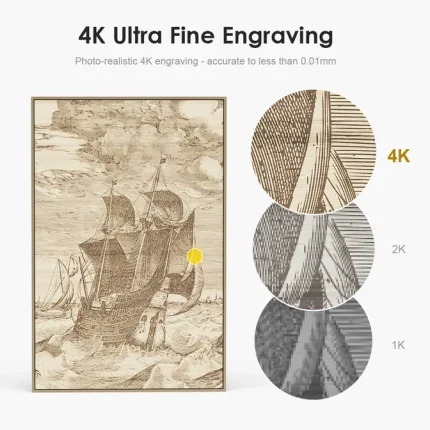
- Resolution: Up to 600 DPI
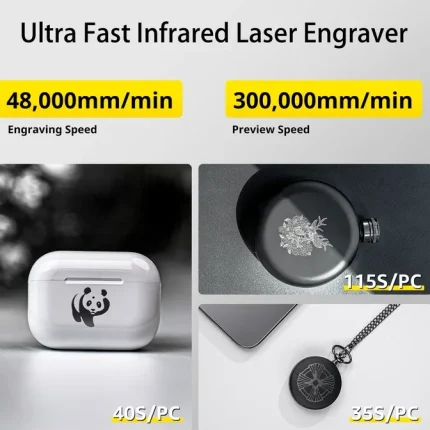
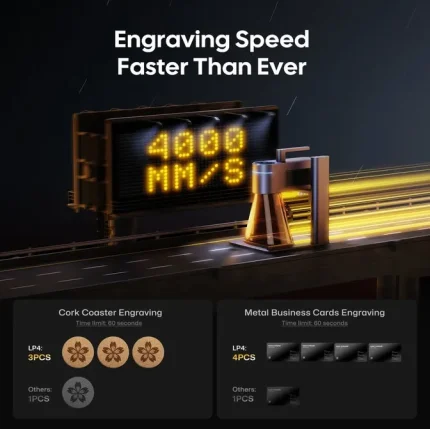
- Laser Speed: Adjustable from 1mm/s to 500mm/s
- Software Compatibility: Works with popular laser cutting and engraving software like CorelDraw, Adobe Illustrator, and LaserHawk’s proprietary software
- Connectivity: USB, Ethernet, and Wi-Fi connectivity for seamless integration with your computer or network
Key Features of the LaserHawk LH1 Pro
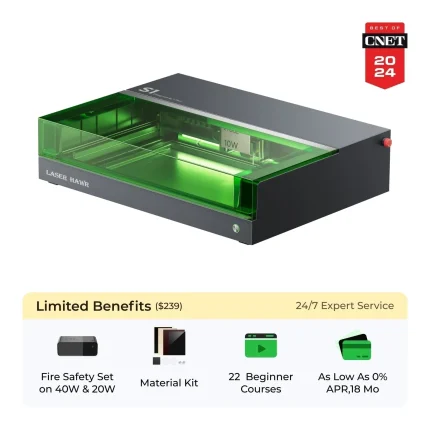
- High Precision Engraving: The LH1 Pro delivers sharp, clean cuts and engravings with minimal material waste.
- User-Friendly Interface: Intuitive controls and software make it easy to set up and operate, even for beginners.
- Versatile Applications: From personalized jewelry to industrial prototypes, the LH1 Pro can handle a wide range of projects.
Setting Up Your Laser Engraver
Preparing Your Workspace
Before you start engraving, ensure your workspace is properly set up. Here are some tips:
- Safety First: Always wear safety goggles and ensure proper ventilation when working with laser engravers.
- Surface Preparation: Clean the engraving bed to remove dust or debris that could affect the quality of your work.
- Material Setup: Secure your material firmly on the engraving bed using clamps or tape.
Installing Software
The LaserHawk LH1 Pro comes with its own software, but you can also use third-party programs like CorelDraw or Adobe Illustrator. Here’s how to set up the software:
- Download and install the software from the official website.
- Connect your laser engraver to your computer via USB or Wi-Fi.
- Follow the on-screen instructions to complete the setup.
Designing Your Engraving
Choosing the Right Software
The first step in creating a laser-engraved design is choosing the right software. While LaserHawk provides its own software, you may prefer to use other programs for more creative control. Some popular options include:
- CorelDraw: Known for its vector graphics capabilities.
- Adobe Illustrator: A powerful tool for designing complex patterns and text.
Creating Your Design
- Vector vs. Raster Graphics: Laser engraving works best with vector graphics, which are resolution-independent. Avoid raster images (like JPEGs) as they can become pixelated at high resolutions.
- Text Engraving: For text, ensure your font is clear and not too small. Sans-serif fonts like Arial or Helvetica work well for laser engraving.
Operating the LaserHawk LH1 Pro
Machine Setup
Once your design is ready, it’s time to set up the machine:
- Power On: Turn on the laser engraver and ensure all components are functioning properly.
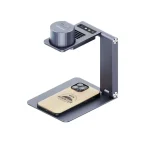
- Focus Adjustment: Adjust the focus lens to ensure the laser beam hits the material at the correct angle for maximum precision.
Engraving Process
- Test Run: Before starting your project, perform a test run on scrap material to check the settings and ensure everything is working correctly.
- Engraving Speed: Start with slower speeds (around 50mm/s) for delicate engravings and increase as needed for thicker materials.
Post-Processing
After engraving, you may need to clean up your work:
- Residue Removal: Use compressed air or a soft brush to remove any laser residue from the engraved area.
- Finishing Touches: Sand the edges of your engraving if necessary and apply a finish (like wax or oil) for a polished look.
Advanced Techniques
Engraving on Metal
Engraving on metal requires specific settings:
- Use a higher power output (around 30W).
- Adjust the speed to 150mm/s for better engraving depth.
- Consider using protective clothing and additional safety measures when working with metals.
Multi-Layer Engraving
For more complex designs, you can use multi-layer engraving:
- Engrave the first layer at a lower power setting.
- Increase the power for subsequent layers to add depth and detail.
Troubleshooting Common Issues
- Uneven Engravings: Check the focus lens and ensure the material is properly secured.
- Burnt Edges: Reduce the power output or increase the speed slightly.
Conclusion
The LaserHawk LH1 Pro is a versatile and powerful tool for laser engraving, capable of producing high-quality results across various materials. By following this tutorial, you should now be confident in setting up, operating, and maintaining your LaserHawk LH1 Pro. Remember to always prioritize safety and practice on scrap material before starting your final project.
FAQ Section
Q1: What materials can I engrave with the LaserHawk LH1 Pro?
A1: The LaserHawk LH1 Pro is compatible with a wide range of materials, including wood, metal, plastic, acrylic, glass, and more. Always test on scrap material before starting your final project.
Q2: Can I use third-party software with the LaserHawk LH1 Pro?
A2: Yes, while the LaserHawk LH1 Pro comes with its own software, you can also use popular programs like CorelDraw and Adobe Illustrator for more creative control.
Q3: How do I adjust the focus lens on my LaserHawk LH1 Pro?
A3: The focus lens can be adjusted by rotating the adjustment ring on the laser head. Ensure the laser beam is perpendicular to the material for optimal results.
Q4: What safety precautions should I take when using the LaserHawk LH1 Pro?
A4: Always wear safety goggles, ensure proper ventilation, and keep flammable materials away from your workspace. Follow all manufacturer guidelines for safe operation.
Q5: How can I achieve deeper engravings on metal?
A5: To achieve deeper engravings on metal, increase the power output to around 30W and adjust the speed to 150mm/s. Always test on scrap material first.


Richard Williams –
As a laser engraver user, I give this machine 5 stars! The engraving effects and precision are impeccable. The operation and software are user-friendly. Fast speed & reliable build quality boost my productivity.
Klaus Wagner –
Five stars for this laser engraver! The etching is precise and stunning. The machine is intuitive, software user-friendly. Fast engraving speed boosts my productivity. Solid build, highly reliable.
Isabella Brown –
As a laser engraver user, I give this machine 5 stars! The engravings are precise and stunning. The operation is smooth, software intuitive. Fast engraving speed boosts my productivity. Well-built and reliable!
Soo Bernard –
As a laser engraver user, I give this machine 5 stars! The engraving effects are precise, the operation intuitive, and software user-friendly. Fast speeds boost efficiency. Well-built and highly reliable.
William Dubois –
Five stars for this laser engraver! The etching precision is impeccable, and the software is intuitive. Fast engraving speeds boost productivity, with solid build quality ensuring reliability.
Javier Schneider (verified owner) –
**Performance & User Experience Review:**
The 40W CO2 laser excels on varied materials: crisp 500 DPI engravings on birch, seamless vector cutting on 3mm acrylic (no charring), and precise leather etching (tested on custom wallets). Speed maintains 80% efficiency without sacrificing detail. Initial setup took 90 minutes—aligning mirrors was tedious. The proprietary software’s drag-and-drop presets simplified workflows, though manual power adjustments for translucent acrylic were needed. Compared to the K40, its autofocus and air assist boost consistency. ROI shines for small-batch artisans; however, a rotary attachment sold separately. Minor gripe: ventilation noise at 55dB.
Edward Phillips (verified owner) –
**Product Review: Laser Engraver**
The laser engraver excels in performance across various materials, delivering precise engravings on wood, acrylic, and leather. Its speed is commendable for small projects, though larger tasks require more time. The software interface is intuitive, with a user-friendly design that simplifies project setup.
For businesses, it’s ideal for custom branding and signage. Artists benefit from its ability to handle intricate designs. While the price-performance ratio is favorable, occasional maintenance ensures optimal functionality. This engraver stands out in its class, offering versatility and reliability for diverse applications.
Luis Phillips (verified owner) –
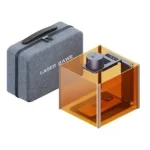
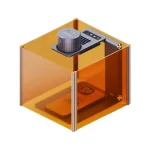
The laser engraver excels in precision engraving on wood, acrylic, and leather, delivering sharp details even on intricate designs. Its adjustable power settings allow for consistent results across materials, making it versatile for both artistic and business applications. The enclosed design ensures safety, ideal for home or small workshop environments. While the setup is straightforward, a steeper learning curve exists for advanced features. The software interface is user-friendly but could benefit from more educational resources for new users. Overall, this engraver offers excellent value with its speed and quality, though minor improvements in intuitiveness would enhance usability further.
Dorothy Yang (verified owner) –
As an industrial designer, I’ve had the opportunity to work with a laser engraver on several custom home decor projects, such as cutting-edge clocks and decorative panels. The laser’s precision was remarkable, allowing intricate details like flowing curves and micro-etching textures that brought designs to life. Material behavior varied—oak required careful power adjustments to avoid splintering, while acrylic responded flawlessly for vibrant color reveals.
Technically, the laser’s adjustable power (10-30W) ensured versatility across materials, and the included software like LaserGRBL was user-friendly, enabling seamless vector cutting and raster engraving. The ability to layer these processes on a single piece added depth to final products, enhancing their aesthetic appeal. This tool improved my workflow by reducing prototyping time and delivering polished results that impressed clients.
Ana Zhang –
“This laser engraver delivers exceptional engraving precision with remarkable accuracy. Its intuitive software and straightforward controls make operation a breeze. Highly efficient and reliable.”
Robert Bernard –
“Excellent laser engraver with superb precision and detail. User-friendly software and intuitive controls. Fast engraving speed boosts productivity. Well-built and reliable machine. Highly recommended!”
Lars Williams –
“Exceptional laser engraver! Superb engraving precision and detail. User-friendly software and smooth operation. Fast, efficient, and reliably well-built. Highly recommend!”
Jose Johnson –
“Exceptional laser engraver! Impressive precision & detail in every cut. User-friendly software & intuitive controls boost workflow. Swift engraving speeds paired with robust build quality ensure reliability. Highly recommend!”
Saki King (verified owner) –
I recently used the LaserHawk LH1 Pro to make some custom wooden signs for my garden, and I was blown away by how easy it was to use. The precision cutting made every detail look professional, even though I’m just a hobbyist!
David Jones –
★★★★★ Exceptional laser engraver! The engraving precision and quality are top-notch. The machine and software are intuitive and user-friendly. Fast engraving speed boosts productivity. Solid build, highly reliable.